(click on any picture to see larger version)
THE PROBLEM
This project came about as the result of the "evil eye". Ok, I may be exagerating just a little, but perhaps you've had the same experience, especially if ham radio is expected to live demurely side-by-side with other household activities. Let me explain...
My frequent homebrew projects usually end up being assembled on the kitchen table. In our small house, it's the only available large, flat surface. In the interim between when I start a project and finish it, the XYL and I usually eat out, or use lap trays. The XYL is extremely indulgent in this regard, for which I'm grateful. The problem arises when a project gets interupted mid-stream, or when I have a series of projects that need to be worked on. It's not really practical to pack it all up into a box, then unpack it a few days later when I have the time to work on it again. But the "it's not really practical" excuse only goes so far. Most recently, after occupying the kitchen table for 3 weeks, the XYL asked when I would be ready to clear the table. When I began mouthing the same excuses about not being "quite finished" with the last project, I got the "eye" followed by a big sigh. It was time to do something, and that was clear.
Now, in our house, the XYL really doesn't mind me working on the kitchen table; in fact, she uses it for her projects as well. What she does mind, is looking at the stuff all over the kitchen table when I'm not actually working on it. What I needed was a slick way of organizing it so that it could be quickly and easily stored out-of-view while I am not actually working on it.
THE SOLUTION
A cheapy rolling tool cart forms the basis for the solution. By "cheapy", I mean light duty. The selected tool cart probably would make a really lousy mechanic's tool box, because the sheet metal and the plastic casters are too light, and the drawers do not have ball-bearing slides. Any real mechanic would scoff at the "cheapy" construction. But the fact is, a heavy duty tool cart, in addition to costing two or three times as much, would be too heavy and cumbersome for our purposes. Since we'll only put lightweight electronic tools and parts in our tool cart (hand tools, pc boards, sorted parts, soldering irons, test cables), the lighter, cheaper model is just about right. The model I selected was priced at $69.95 at the local Home Depot.
To the stock rolling cart, we added two trunk handles ($5 each), one on each side. While I still planned to work at the kitchen table, I wanted a little table space with the tool cart in case the XYL had bigger plans for the kitchen table (or just got to it first ;-)
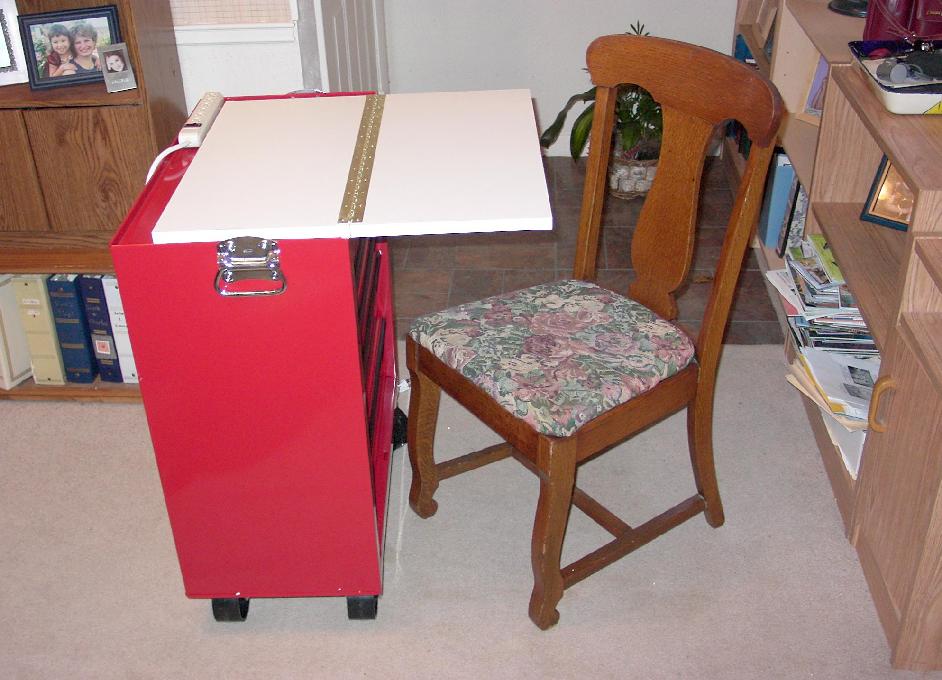
I bought two 12 x 24 shelves ($4 each), the kind with white masonite exterior, which cleans well and provides a hard surface. I also bought a 30" continuous hinge (piano hinge), which I cut to 23-1/2 inches. By aligning the two shelves side-by side, and with careful marking and drilling, we were able to join the two pieces via the piano hinge. Then, the tool cart's top surface was drilled and the shelf was mounted to it, such that the new "table" surface could be folded back within the original form factor of the tool cart, or folded out when needed for a work surface. I was somewhat surprised at how sturdy the extended table was. The picture at the top gives a pretty good view of the QRP Workbench with the table folded down (extended), with a typical dining room chair alongside for scale.
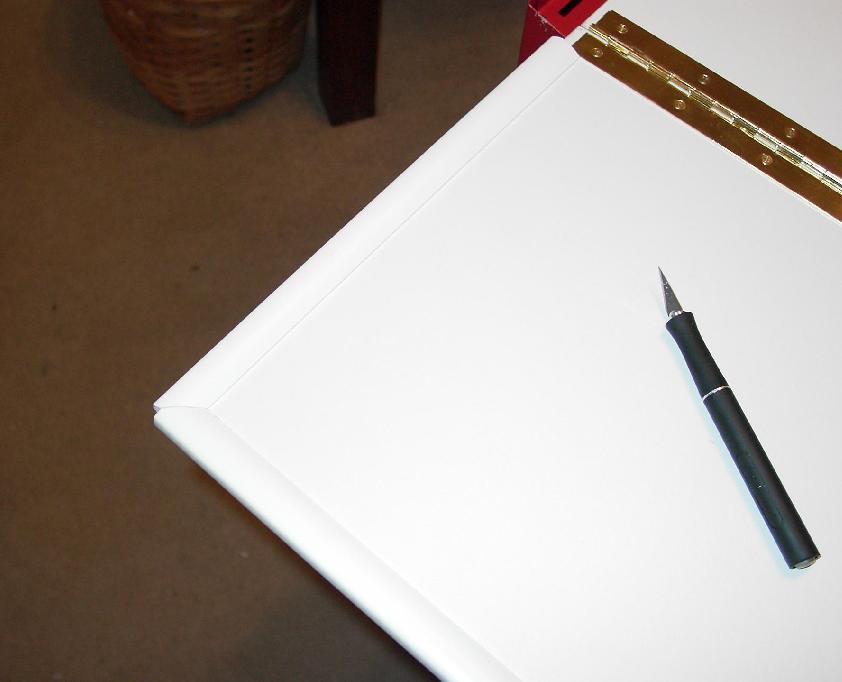
To finish it off, we mounted some white plastic "outside-corner" moulding all around the foldout shelf. This way, those little surface mount diodes won't roll off the table and into the carpet, never to be seen again. Here's a picture of the shelf/moulding construction:
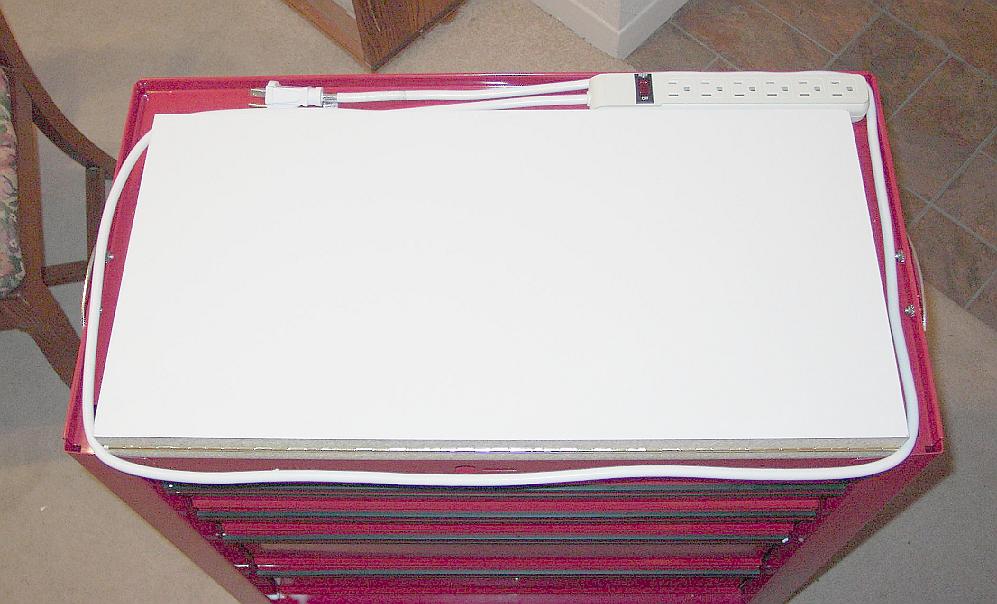
Finally, we mounted a power strip in the space behind the shelf, which just happened to be perfectly sized for it, and allows the cord to be wrapped neatly around the top when the unit is in its "storage" confinuration. Here's a picture from the top, showing the power strip and shelf alignment (closed), and the cord coiled for storage:
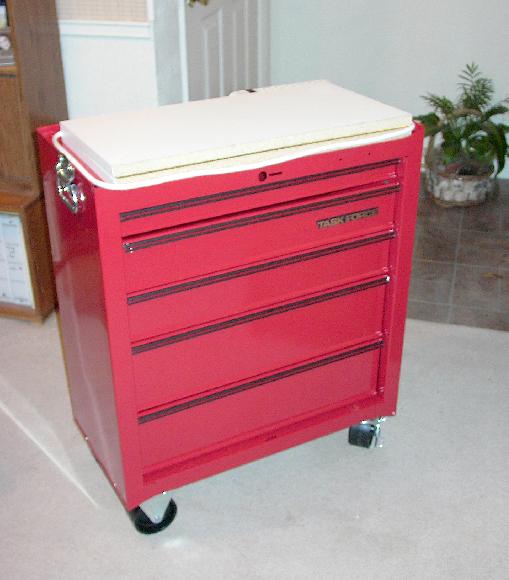
And here's an overall view of the unit, all closed up for storage:
SUMMARY
The QRP Workbench has plenty of storage for those partially-completed projects. I used the larger bottom drawer to store my digitally-controlled soldering station and handle and accessories, including solder-tweezers, spare tips, solder, and solder-sucker.
The small top drawer is perfect for hand tools, and the drawer under it for keeping partially built assemblies, and china bowls for holding small parts and hardware. The mid-sized drawer below that, provides a convenient place for storing test clips and jumper cables, a few BNC patch cables, a small box of adapters, and the digital multimeter. I even have one large drawer left over, for who knows what?
When I want to work on something, I can just pull it out of the drawer, and put it on the kitchen table, or on the QRP Workbench's table, if need be. I can plug the cord into the nearest available outlet, and have my power strip for the soldering iron or bench supply or other test equipment.
And when I'm done, I scoop it all up, dump it in the drawers, fold up the table and coil the cord, and roll it out to the garage, where it stays out of sight until I need it again.
And so there was peace over all the land from that day forward...
...And no more evil eye.
73,
Monty N5ESE
dit dididit dit